Honeywell T6 Install Manual: A Comprehensive Guide
This manual provides a detailed, step-by-step process for installing your Honeywell T6 thermostat, ensuring efficient and smart temperature control within your home environment․
Understanding the Honeywell T6 Thermostat
Before installation, familiarize yourself with the Honeywell T6, a smart thermostat from the Lyric series․ It’s designed for user-friendly temperature control and broad HVAC system compatibility․ Key to its functionality is Wi-Fi connectivity, enabling convenient remote operation through a dedicated smartphone application․
The T6 boasts an easy-to-read display and intuitive interface․ Understanding its features – like scheduling and geofencing – will maximize your comfort and energy savings․ This thermostat isn’t just about setting temperatures; it’s about creating a personalized climate experience tailored to your lifestyle․
Key Features of the Honeywell T6 Series
The Honeywell T6 series distinguishes itself with several key features․ Wi-Fi connectivity allows for remote control via the Honeywell Home app, offering convenience and energy management․ Smart learning capabilities adapt to your schedule, optimizing temperature settings for comfort and efficiency․
Geofencing automatically adjusts the temperature based on your location, saving energy when you’re away․ The thermostat supports flexible scheduling, allowing customized heating and cooling programs․ Its clear display ensures easy readability, and compatibility with various HVAC systems makes it a versatile choice for many homes․
Compatibility with HVAC Systems
The Honeywell T6 thermostat demonstrates broad compatibility with a wide range of HVAC systems․ It generally supports single-stage and multi-stage heating and cooling systems, including furnaces, air conditioners, and heat pumps․ Compatibility extends to systems with conventional and communicating wiring configurations․
However, it’s crucial to verify compatibility with specific system types before installation․ Systems requiring a C-wire (common wire) may need an adapter kit if one isn’t already present․ Always consult the Honeywell compatibility checker or a qualified HVAC technician to ensure seamless integration with your existing setup․
Wi-Fi Connectivity and Smartphone Control
A key feature of the Honeywell T6 is its robust Wi-Fi connectivity, enabling convenient smartphone control․ After connecting to your home’s Wi-Fi network, you can utilize the Honeywell Home app (available for iOS and Android) to remotely adjust temperature settings, create schedules, and monitor energy usage․
This remote access provides flexibility and energy savings․ The app also offers features like geofencing, which automatically adjusts the temperature based on your location․ Seamless integration allows for a comfortable and efficient home climate, managed directly from your smartphone or tablet․

Pre-Installation Checklist
Before beginning, gather necessary tools, review safety precautions, and accurately identify your existing HVAC system type for a smooth installation process․
Tools Required for Installation
Successfully installing your Honeywell T6 thermostat requires a few essential tools․ A Phillips head screwdriver is crucial for removing your old thermostat and securing the mounting plate․ A small, flathead screwdriver may be needed for certain wire terminal connections․
You’ll also want a level to ensure the T6 mounting plate is perfectly aligned on the wall, preventing display tilt․ Wire strippers are helpful for preparing wires if needed, and a pencil is useful for marking wire locations․
Finally, consider having a digital multimeter available to verify power is off before working with wiring, enhancing safety during the installation process․
Safety Precautions
Before beginning the Honeywell T6 installation, prioritize safety! Always turn off power to your HVAC system at the breaker box to avoid electrical shock․ Carefully read and understand all instructions before starting, as failure to follow them could damage the product or create a hazardous situation․
If you are uncomfortable working with electrical wiring, consult a qualified HVAC technician․
Ensure the installation location is dry and free from obstructions․ When handling wires, avoid touching bare conductors․ It is crucial that installation is performed by a competent person, adhering to all local electrical codes and regulations․
Identifying Your HVAC System Type
Properly identifying your HVAC system is crucial for a successful Honeywell T6 installation․ Common systems include forced air (furnace and air conditioner), heat pump, and boiler systems․ Examine your existing thermostat wiring; the wire colors and terminal designations offer clues․
A ‘C’ wire (common wire) is often present in more modern systems, indicating compatibility with the T6’s power requirements․
If you have a boiler system, locate the boiler nearby for convenient access․ Understanding your system type ensures correct wiring and optimal thermostat functionality․
Installation Steps
Begin by safely removing your old thermostat, mounting the T6 base plate, and carefully connecting the wires according to the provided wiring diagram for a seamless setup․
Removing Your Old Thermostat
Before starting, turn off power to your HVAC system at the breaker to avoid electrical shock․ Carefully remove the cover of your existing thermostat, often secured by a screw or snap-off mechanism․ Take a clear picture of the existing wiring – this is crucial for correct reconnection to the Honeywell T6․
Label each wire with the corresponding terminal designation using the provided stickers․ Disconnect the wires one at a time, avoiding any shorts․ Once all wires are disconnected, carefully remove the old mounting plate from the wall․ Be mindful of any wall anchors or screws that may need to be removed or replaced for the new T6 mounting plate․
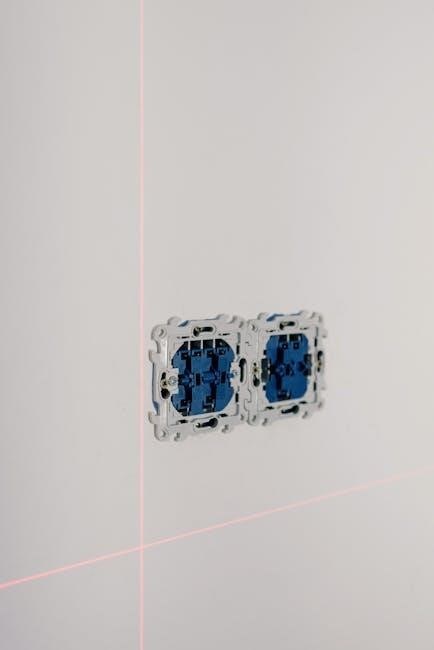
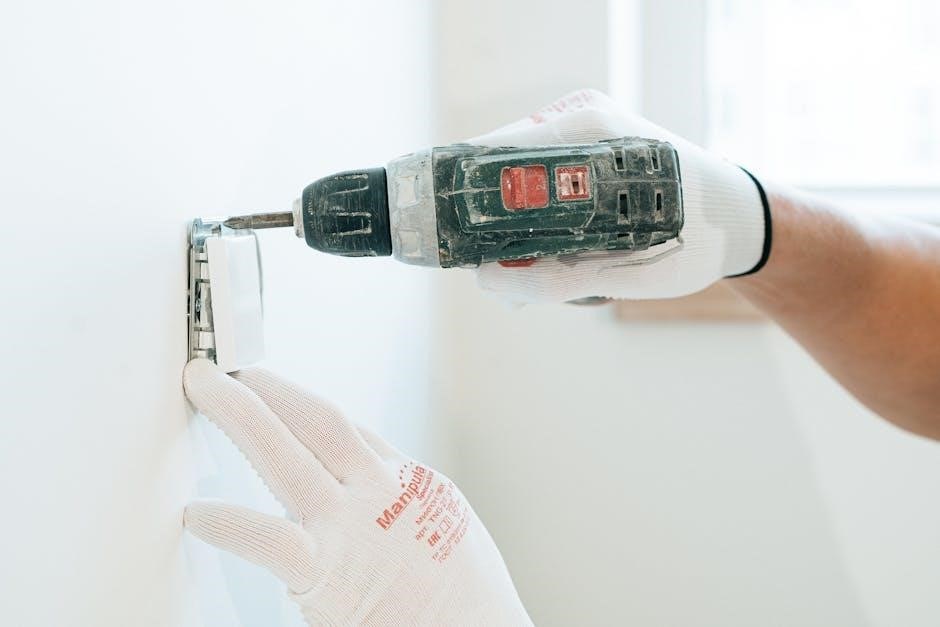
Mounting the T6 Mounting Plate
Position the T6 mounting plate on the wall, ensuring it’s level using a level tool․ Utilize the existing screw holes whenever possible to minimize wall damage․ If new holes are needed, mark their locations and drill appropriately sized holes, inserting wall anchors if necessary․
Secure the mounting plate to the wall using the provided screws․ Ensure the plate is firmly attached and doesn’t wobble․ For installations requiring coverage of paint gaps from the old thermostat, utilize the optional cover plate, securing it with the supplied mounting screws – avoid overtightening․
Optional Cover Plate Installation
The optional cover plate is designed to conceal any paint gaps or imperfections left from the removal of your previous thermostat․ Separate the cover plate from the mounting plate before beginning․ Align the cover plate over the mounted base, ensuring it fully covers the existing wall area․
Insert and carefully tighten the mounting screws provided with the cover plate kit․ It’s crucial not to overtighten, as this could damage the plate or the wall․ Confirm the cover plate is securely fastened and flush against the wall, providing a clean and finished appearance․
Wiring the Honeywell T6 Thermostat
Before connecting any wires, ensure power is completely shut off to your HVAC system at the breaker box․ Carefully identify each wire connected to your old thermostat and note its corresponding terminal designation․ The Honeywell T6 base plate features clearly labeled terminals for easy wire connection․
Match each wire to its designated terminal on the T6 base plate and securely insert it into the appropriate connector․ Double-check all connections to ensure they are firm and properly seated․ Incorrect wiring can damage the thermostat or your HVAC system, so proceed with caution․
Identifying Wires and Terminal Designations
Accurate wire identification is crucial for a successful installation․ Common wire colors include Red (Power), White (Heat), Yellow (Cool), Green (Fan), and Blue (Common)․ However, wire colors can vary, so rely on the terminal designations on your old thermostat․
The Honeywell T6 base plate terminals are labeled R, W, Y, G, and C․ ‘R’ is for power, ‘W’ for heating, ‘Y’ for cooling, ‘G’ for the fan, and ‘C’ for the common wire – essential for Wi-Fi connectivity․ Carefully document each wire’s origin before disconnecting it from the old thermostat․
Connecting the Wires to the Base Plate
With wires identified, carefully insert each wire into the corresponding terminal on the Honeywell T6 base plate․ Ensure each wire is securely fastened; a loose connection can cause operational issues․ Gently tug on each wire after insertion to confirm it’s held firmly in place․
Use a small screwdriver if needed to fully seat the wires․ Double-check that no bare wire is exposed outside the terminal․ Incorrect wiring can damage the thermostat or your HVAC system, so proceed with caution and refer to your wiring documentation․

Powering Up and Initial Setup
After wiring, install batteries if needed, attach the thermostat to the mounting plate, and verify the display powers on correctly for initial setup․
Installing Batteries (if applicable)
Before fully attaching the T6 thermostat to the mounting plate, check if your model requires batteries for operation․ Some T6 models can function solely on power from the HVAC system (C-wire), while others utilize batteries as a backup or primary power source․
Typically, the thermostat will indicate the battery type needed (usually AA or AAA)․ Insert the batteries into the designated compartment, ensuring correct polarity (+ and -)․ A proper battery installation is crucial for reliable operation, especially during power outages or if a C-wire isn’t available․
Confirm the battery compartment is securely closed before proceeding to the next step․
Attaching the Thermostat to the Mounting Plate
Carefully align the Honeywell T6 thermostat with the mounted base plate․ Gently push the thermostat onto the plate, ensuring it clicks securely into place․ Avoid forcing it, as this could damage the connections or the thermostat itself․
Once attached, verify that the thermostat is firmly seated and doesn’t wobble․ A secure connection is vital for proper operation and accurate temperature readings․
Loosen the front screw to remove cover or tighten it when the cover is back in place․ This ensures a snug fit and prevents accidental disconnections․
Initial Power-On and Display Check
After attaching the thermostat to the mounting plate, observe the display․ It should illuminate, indicating the unit is receiving power․ If the display remains blank, double-check the wiring and battery installation (if applicable)․
The initial screen will likely prompt you to begin the setup process, including date and time configuration and Wi-Fi connection․
Ensure the display is clear and easy to read․ A properly functioning display is crucial for navigating the thermostat’s features and programming your desired settings․

Connecting to Wi-Fi
Establishing a Wi-Fi connection unlocks remote control and smart features via the Honeywell Home app, enhancing your thermostat’s functionality and convenience․
Downloading the Honeywell Home App
To begin connecting your Honeywell T6 thermostat to Wi-Fi, the first crucial step is downloading the Honeywell Home app to your smartphone or tablet․ This app serves as the central hub for controlling and monitoring your thermostat remotely․ You can find the Honeywell Home app readily available for both iOS devices through the Apple App Store and for Android devices via the Google Play Store․
Simply search for “Honeywell Home” within your respective app store and select the official app developed by Resideo․ Once located, tap the “Install” or “Get” button to download and install the app on your device․ Ensure you have a stable internet connection during the download process․ After installation, launch the app and create an account or log in if you already have one․
Pairing the Thermostat with the App
With the Honeywell Home app installed and your account set up, the next step is to pair your T6 thermostat with the app․ Within the app, navigate to the “Add a Device” or “+” icon, typically found on the home screen․ Select “Thermostat” from the list of device types․ The app will then guide you through the pairing process, which usually involves putting your T6 thermostat into pairing mode․
This often requires pressing and holding a specific button on the thermostat itself․ The app will search for nearby thermostats; once your T6 appears, select it and follow the on-screen prompts to complete the pairing process․ A successful pairing will allow full control of your thermostat via the app․
Configuring Wi-Fi Settings
After pairing, the Honeywell Home app will prompt you to configure your Wi-Fi settings for the T6 thermostat․ Ensure your smartphone or tablet is connected to the 2․4 GHz Wi-Fi network you wish the thermostat to join – the T6 typically doesn’t support 5 GHz networks․ The app will display a list of available networks; select yours and enter the correct password․
The thermostat will then attempt to connect to the Wi-Fi; This process may take a few moments․ Once connected, the app will confirm successful Wi-Fi configuration, enabling remote control and access to advanced features․

Programming and Customization
Utilize the Honeywell Home app to personalize your T6 thermostat with schedules, temperature preferences, and smart features for optimal comfort and energy savings․
Setting the Date and Time
Accurate date and time settings are crucial for proper scheduling and operation of your Honeywell T6 thermostat․ Through the Honeywell Home app, navigate to the device settings and locate the date and time options․ Ensure your thermostat is connected to Wi-Fi for automatic synchronization; otherwise, manually input the correct information․
Double-check the settings to avoid scheduling errors․ Incorrect time settings can lead to heating or cooling occurring at unintended times, impacting comfort and energy efficiency․ The app interface provides a user-friendly way to adjust these parameters, ensuring your T6 operates precisely as programmed․
Creating a Heating/Cooling Schedule
The Honeywell T6 allows for customized heating and cooling schedules to optimize comfort and energy savings․ Within the Honeywell Home app, access the scheduling feature to define different temperature settings for various times of the day and days of the week․ You can create unique schedules for weekdays and weekends, tailoring them to your lifestyle․
Programmed schedules ensure your home is comfortably heated or cooled only when needed, reducing energy waste․ The app’s intuitive interface simplifies schedule creation and modification, allowing for easy adjustments as your routines change․ Experiment with different settings to find the perfect balance between comfort and efficiency․
Adjusting Temperature Preferences
The Honeywell T6 thermostat offers flexible temperature adjustment options to suit your individual comfort levels․ Directly on the thermostat’s display, or through the Honeywell Home app, you can easily raise or lower the desired temperature․ The app provides precise control, allowing adjustments down to a single degree․
Explore features like temporary holds, overriding the programmed schedule for a specific duration․ Utilize the “Smart Response” function for quicker heating or cooling to reach your preferred temperature faster․ Fine-tune settings to create a consistently comfortable environment, optimizing both your well-being and energy consumption․

Troubleshooting Common Issues
This section addresses frequent problems like power failures, Wi-Fi connectivity disruptions, and inaccurate temperature readings, offering solutions for a smooth experience․
Thermostat Not Powering On
If your Honeywell T6 thermostat fails to power on, begin by verifying the battery installation, if applicable, ensuring correct polarity․ Next, double-check all wiring connections at the base plate and within the HVAC system, confirming secure and accurate placement according to the wiring diagram․
Inspect the circuit breaker controlling your HVAC system to confirm it hasn’t tripped․ A faulty C-wire (common wire) is a common culprit; ensure it’s properly connected․ If issues persist, consult a qualified HVAC technician to diagnose potential problems with the HVAC system itself or the thermostat’s internal components․
Wi-Fi Connection Problems
Troubleshooting Wi-Fi connectivity issues with your Honeywell T6 thermostat starts with verifying your home network is functioning correctly․ Ensure your router is broadcasting a 2․4 GHz signal, as the T6 typically doesn’t support 5 GHz networks․
Confirm you’re entering the correct Wi-Fi password within the Honeywell Home app during the pairing process․ Restart both your router and the thermostat․ If problems continue, try moving the thermostat closer to the router to improve signal strength․ Check for firmware updates within the app, as these often include connectivity improvements․
Incorrect Temperature Readings
If your Honeywell T6 thermostat displays inaccurate temperature readings, first ensure it isn’t directly exposed to sunlight, drafts, or heat-generating appliances․ These factors can significantly skew the temperature sensor’s accuracy․
Calibrate the temperature within the Honeywell Home app; this allows you to offset the reading to match a trusted thermometer․ Verify the thermostat is securely mounted to the wall, as a loose connection can cause inaccurate readings․ If the issue persists, consider resetting the thermostat to factory defaults and repeating the setup process․

Advanced Features
Explore geofencing, smart learning, and seamless integration with popular smart home platforms to maximize your Honeywell T6 thermostat’s capabilities and convenience․
Geofencing Capabilities
Honeywell T6’s geofencing feature automatically adjusts your home’s temperature based on your smartphone’s location․ This intelligent system detects when you leave or approach your home, proactively switching to energy-saving settings when you’re away and restoring your preferred comfort levels upon your return․
Setup is managed through the Honeywell Home app, allowing you to define a virtual perimeter around your house․ Customize the geofence radius to suit your needs, ensuring optimal responsiveness․ This feature minimizes energy waste and maximizes comfort, providing a truly smart and automated climate control experience․ It’s a convenient way to save money and enjoy a perfectly comfortable home․
Smart Learning Features
The Honeywell T6 thermostat incorporates smart learning algorithms to optimize your heating and cooling schedule automatically․ Over time, it observes your temperature adjustments and preferences, building a personalized schedule that aligns with your lifestyle․ This eliminates the need for manual programming, providing consistent comfort without constant intervention․
The thermostat learns when you typically adjust the temperature, and adapts accordingly․ It anticipates your needs, ensuring your home is comfortable when you’re there and energy-efficient when you’re away․ This feature simplifies operation and delivers significant energy savings, making your home smarter and more efficient․
Integration with Smart Home Platforms
The Honeywell T6 thermostat seamlessly integrates with popular smart home ecosystems, enhancing your connected living experience․ Compatibility includes Amazon Alexa, Google Assistant, and other platforms, allowing voice control of your home’s temperature․ You can adjust settings, create scenes, and monitor energy usage using simple voice commands․

This integration provides a centralized control hub for all your smart devices․ Control your thermostat alongside lights, locks, and other connected appliances; Enjoy a more convenient and automated home environment, maximizing comfort and energy efficiency through unified smart home control․
Junction Box Adapter Installation
Proper adapter mounting ensures a secure and stable connection for your T6 thermostat, accommodating various wall types and electrical box configurations effectively․
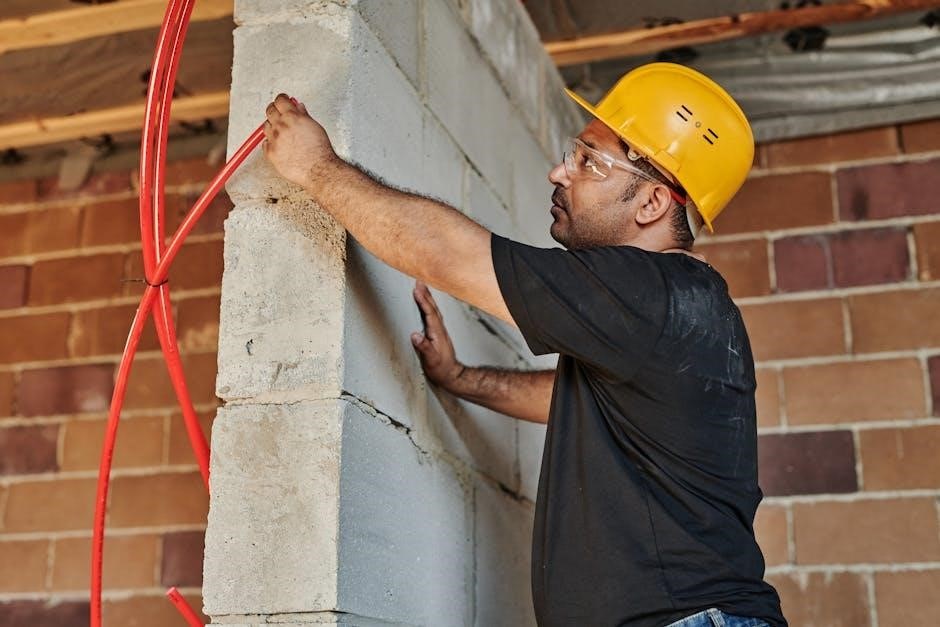
Mounting the Junction Box Adapter
Begin by carefully positioning the Junction Box Adapter against the wall, ensuring it aligns with the existing electrical box or desired mounting location․ Utilize a level to guarantee a straight and stable installation․ Secure the adapter using appropriate screws – typically provided within the kit – driving them firmly into the wall studs or using wall anchors for added support if necessary․
It’s crucial to avoid overtightening the screws, as this could potentially damage the adapter or the wall surface․ Double-check the adapter’s stability before proceeding, ensuring it’s firmly attached and can reliably support the weight of the thermostat․ Proper mounting is fundamental for a safe and functional installation․
Securing the Adapter to the Wall
Once positioned, firmly secure the Junction Box Adapter to the wall using the supplied mounting screws․ Ensure the screws penetrate deeply into wall studs for maximum stability, or utilize appropriate wall anchors if studs aren’t accessible․ A snug fit is essential, preventing any wobble or movement that could compromise the thermostat’s connection․
Avoid excessive force when tightening the screws to prevent damage to the adapter or the wall․ Verify the adapter is flush against the wall surface and doesn’t protrude, creating a clean and professional appearance․ A properly secured adapter forms the foundation for a reliable thermostat installation․
Ensuring Proper Electrical Connection
Before proceeding, always disconnect power to your HVAC system at the breaker box for safety․ Carefully connect the wires from your wall to the corresponding terminals on the Junction Box Adapter, referencing your existing thermostat’s wiring configuration․ Double-check each connection to guarantee a secure and accurate link, preventing potential shorts or malfunctions․
Ensure no bare wires are exposed, and all connections are tight․ A loose connection can lead to intermittent operation or damage to the thermostat․ Once connected, gently tuck the wires into the junction box, avoiding any pinching or strain․